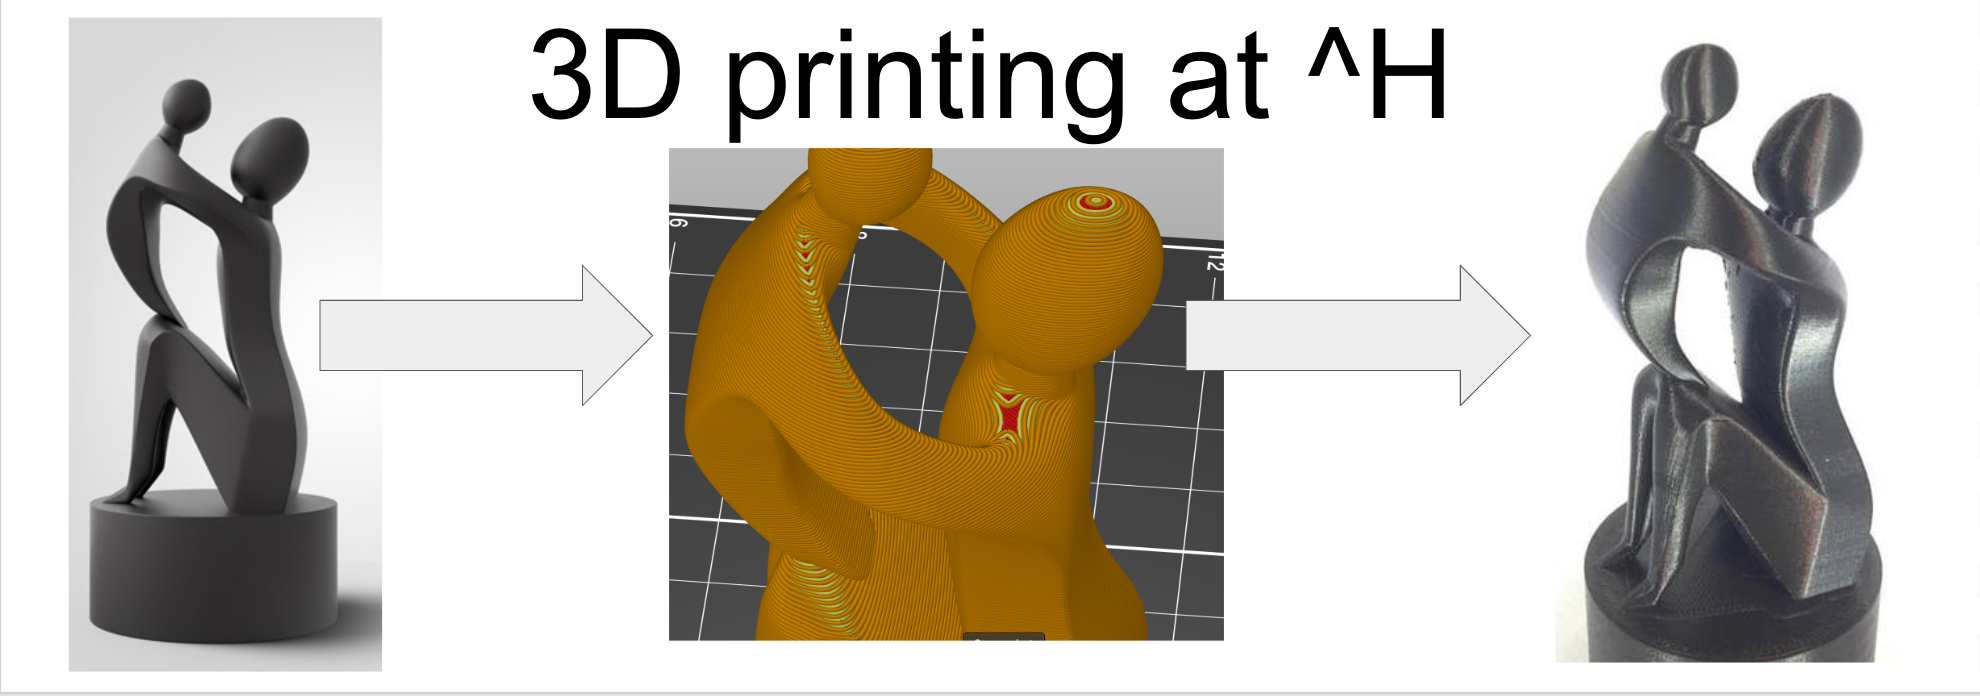
¶ 3D Printing Overview
- Find or create a model to print - export this model in STL format
- Load the model into a slicer to create GCODE that can be printed. The slicer is a program “slices” the model into layers with printer-specific instructions that control the printing of each layer. You can use your choice of slicers that support the target printer but we highly recommend using's Prusa's slicer with Prusa printers.
- Transfer the GCODE to the printer of choice
- Initiate printing
- Make sure the first few layers worked
- Wait for completion (it's fine to leave the space after the first few layers)
If you haven't done an orientation session on 3D printing at PDX Hackerspace, please schedule one with @hannis before using the printers.
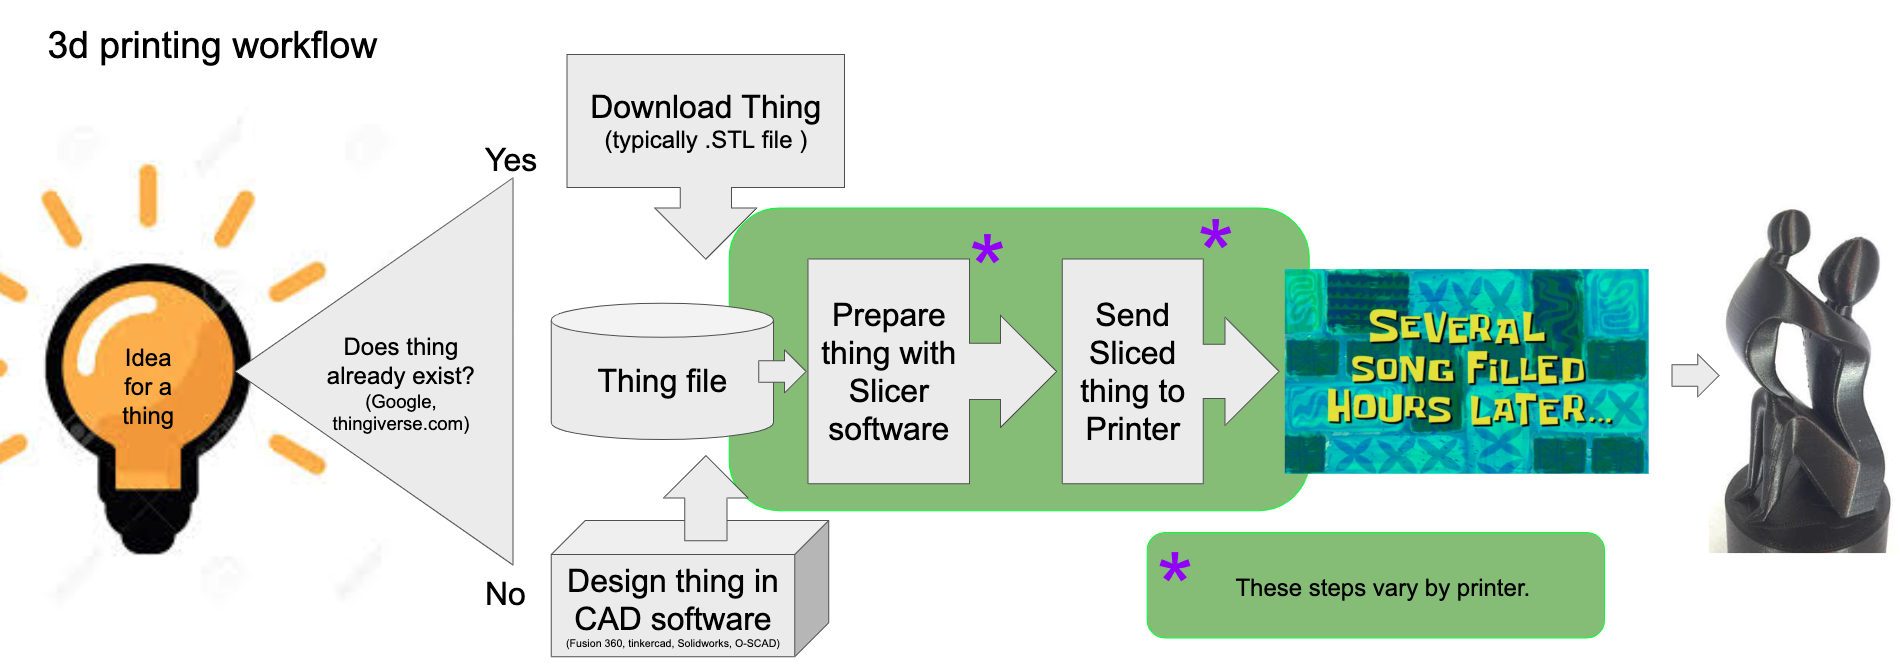
First, you'll need something to print. You can start with an existing model or create your own.
Once you have a model, you'll need to choose a plastic filament to print it in, and a printer to print it with.
The process of converting the model into instructions that the printer understands is called "slicing", because it slices the model into layers. You'll need to know both the plastic and the printer in order to slice your model.
Once you've sliced your model, you can upload it to the printer and start printing.
¶ Finding 3D Models
Good sources of models:
- thingiverse
- Printables
- YouMagine
- Feel free to add other good places to find models!
You'll usually want a model in either .STL or .OBJ format.
¶ Creating 3D Models
Most software for creating models is CAD - Computer Aided Design - or drafting software. You'll want to use something that can output .STL or .OBJ files.
Good software for creating models:
- Tinkercad
- Feel free to add other software for creating models!
If you'd rather write instructions to generate a model than draw one, check out OpenSCAD. Here's a simple OpenSCAD program for printing a cube with a sphere cut out of it:

difference() {
translate([-25, -25, -25])
cube([50, 50, 50]);
sphere(d = 60);
}
If you try out OpenSCAD you'll want its cheatsheet.
When you create a model, remember that if you keep it as hollow as possible you'll reduce the amount of plastic and time needed to print it. You'll also reduce its strength and structural integrity.
¶ Choosing A Filament
Common types of filament include:
- PET/PETG - PET is used to make plastic bottles. It's reasonably strong and safe to work with.
- PLA - PLA can be a bit brittle and has a lower melting point. PLA may droop inside a hot car in the summer.
- ABS - ABS is tough and has a high melting point. Printing it also produces fumes that give many people headaches, so we usually avoid printing with it. It's a good choice for prints intended to be outdoors.
Our printers are usually loaded with PETG plastic. You should always check what filament is loaded in a printer before using it.
¶ Choosing A Printer
If your print will fit in a Prusa MK4S and doesn't need multiple filaments then please use one of the Prusa MK4S printers instead of the XL.
¶ Slicing The Model
You'll use "slicing" software like Cura, Slic3r or Prusaslicer to turn your model into a G-code file that your printer understands.
If you're starting out, use the slicing software that goes with the printer you're using. Check out the printer's page in this wiki to learn more about its software.
The blue notebook computers next to the Dremel in the main space have copies of all the slicers for our printers, already configured for them.
After you start the correct program, import your model. The slicer will let you make simple changes to the model - expand or shrink it, rotate it, make additional copies of it.
The model should be:
- as flat as possible on the surface of the bed in the slicer
- not sticking through the bottom of the bed
- fit in the volume of the printer (see the printer's page on the wiki for more info on the maximum size it can print)
If the model has unsupported areas (like a bridge, or arms, or generally things sticking out or crossing over open spaces), you might want to select the "supports" option, which will add thin plastic supports under areas which might sag without them.
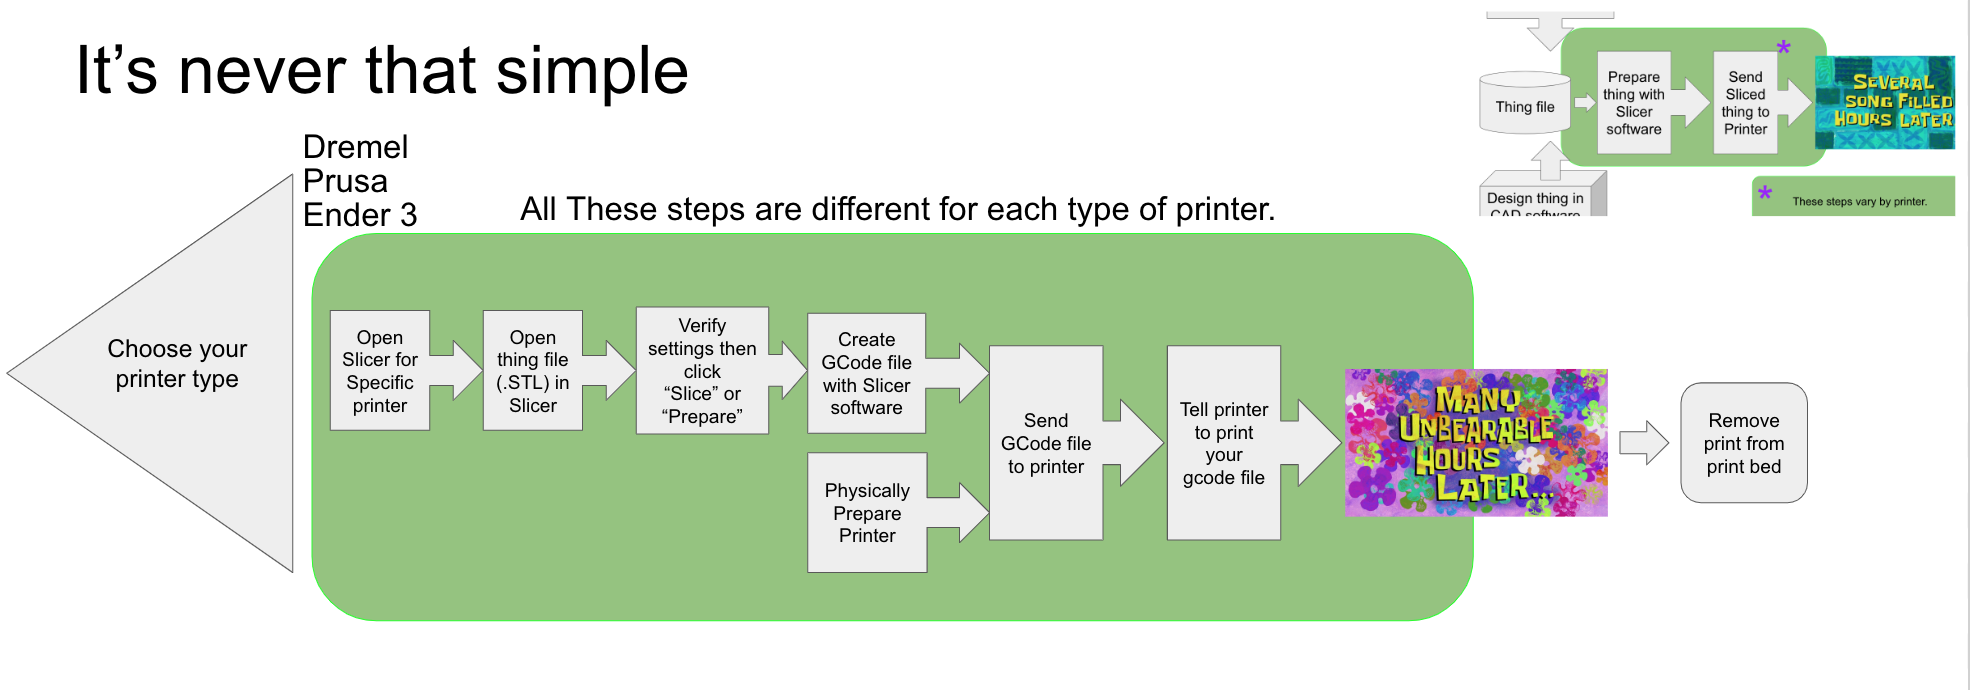
¶ Printing
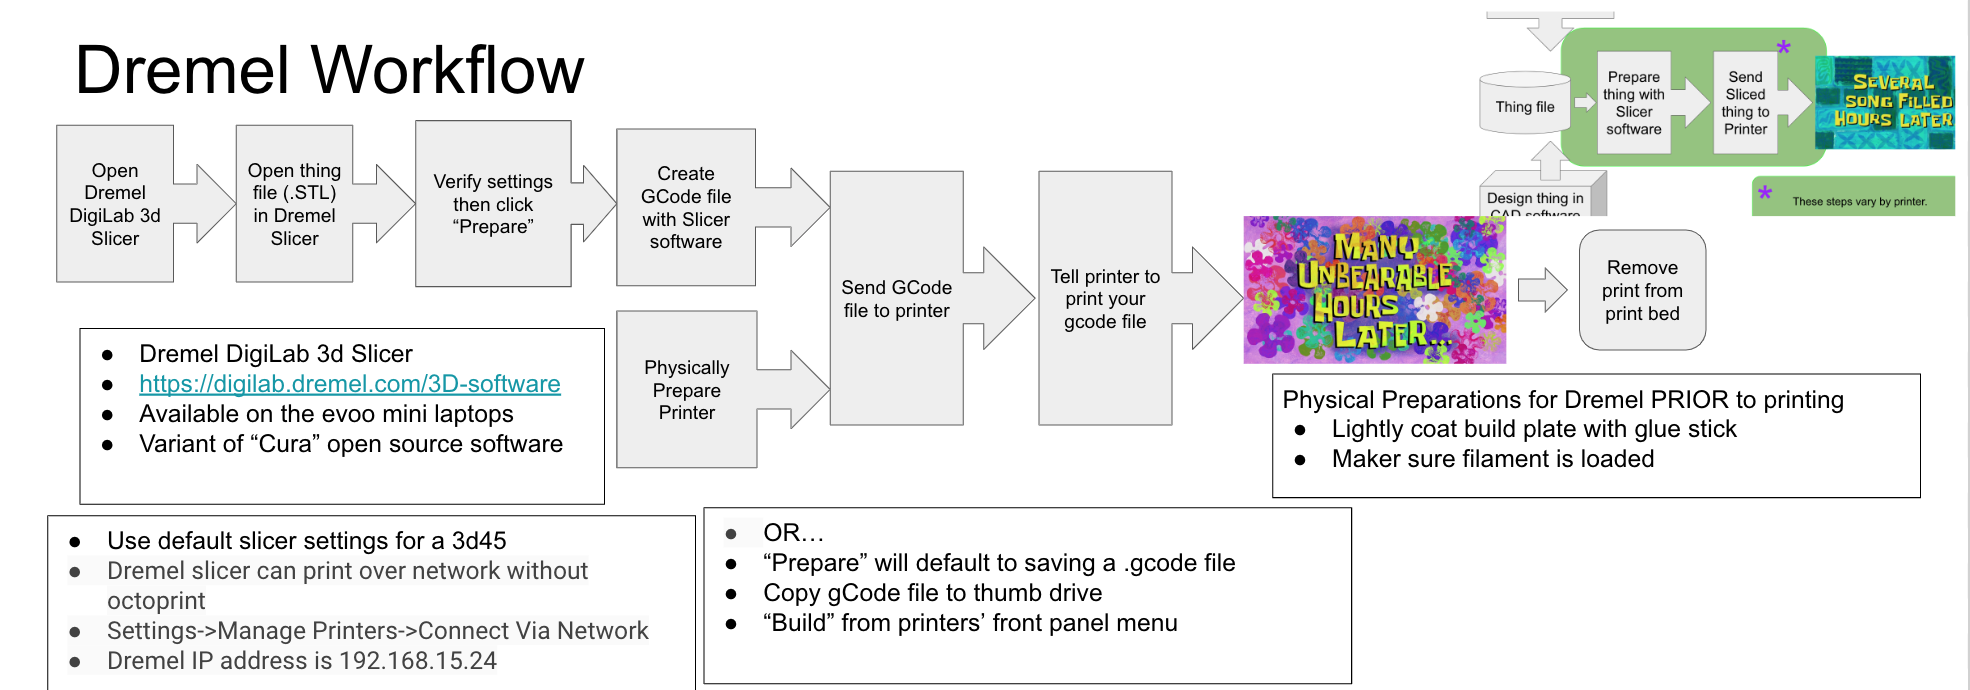
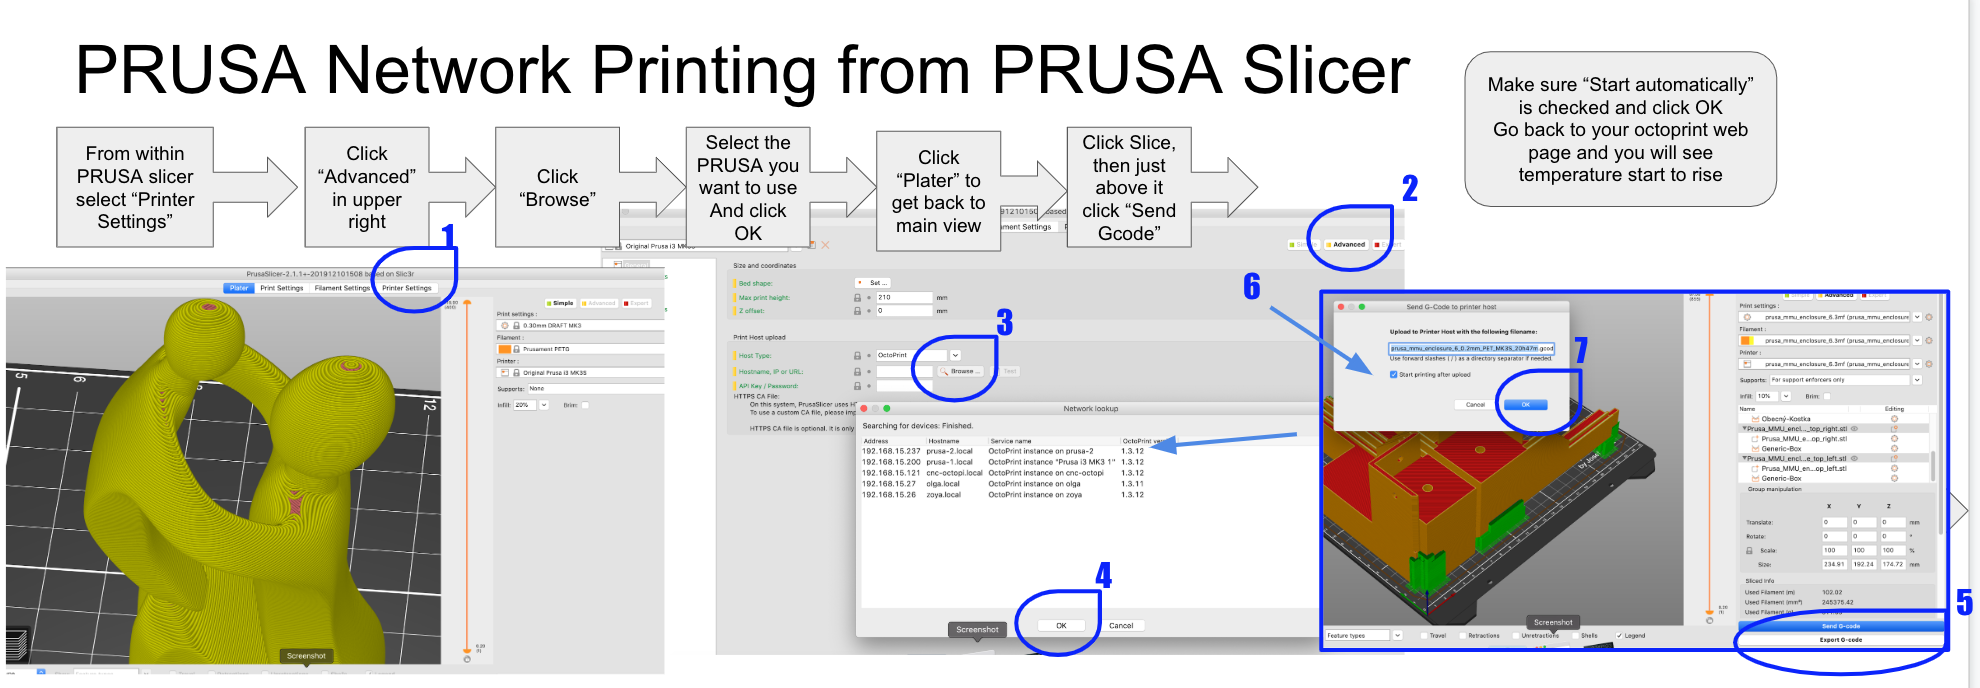
Each different type of printer has a slightly different workflow. For example We use OctoPrint to print on the Prusa and Ender printers (as well as the CnC machines. And the Dremel uses it's own slicer and built in system to print over the network directly from within the slicer software.
OctoPrint provides a web interface for uploading, storing and printing .gcode files, lets you perform basic control over the printer (preheating the nozzle and bed, moving the bed, moving the print head) and monitor the print. The Dremel does not currently support OctoPrint, so its workflow is slightly different.
Please see the wiki page specific to the printer you want to use for more details.

¶ Things to Remember:
In general you'll want to ensure that the print bed is prepared for the print (cleared, clean and possibly coated with glue stick, depending on the printer), that there's enough filament loaded, and that it's the color you want to use. Then you'll upload the file and then start the print.
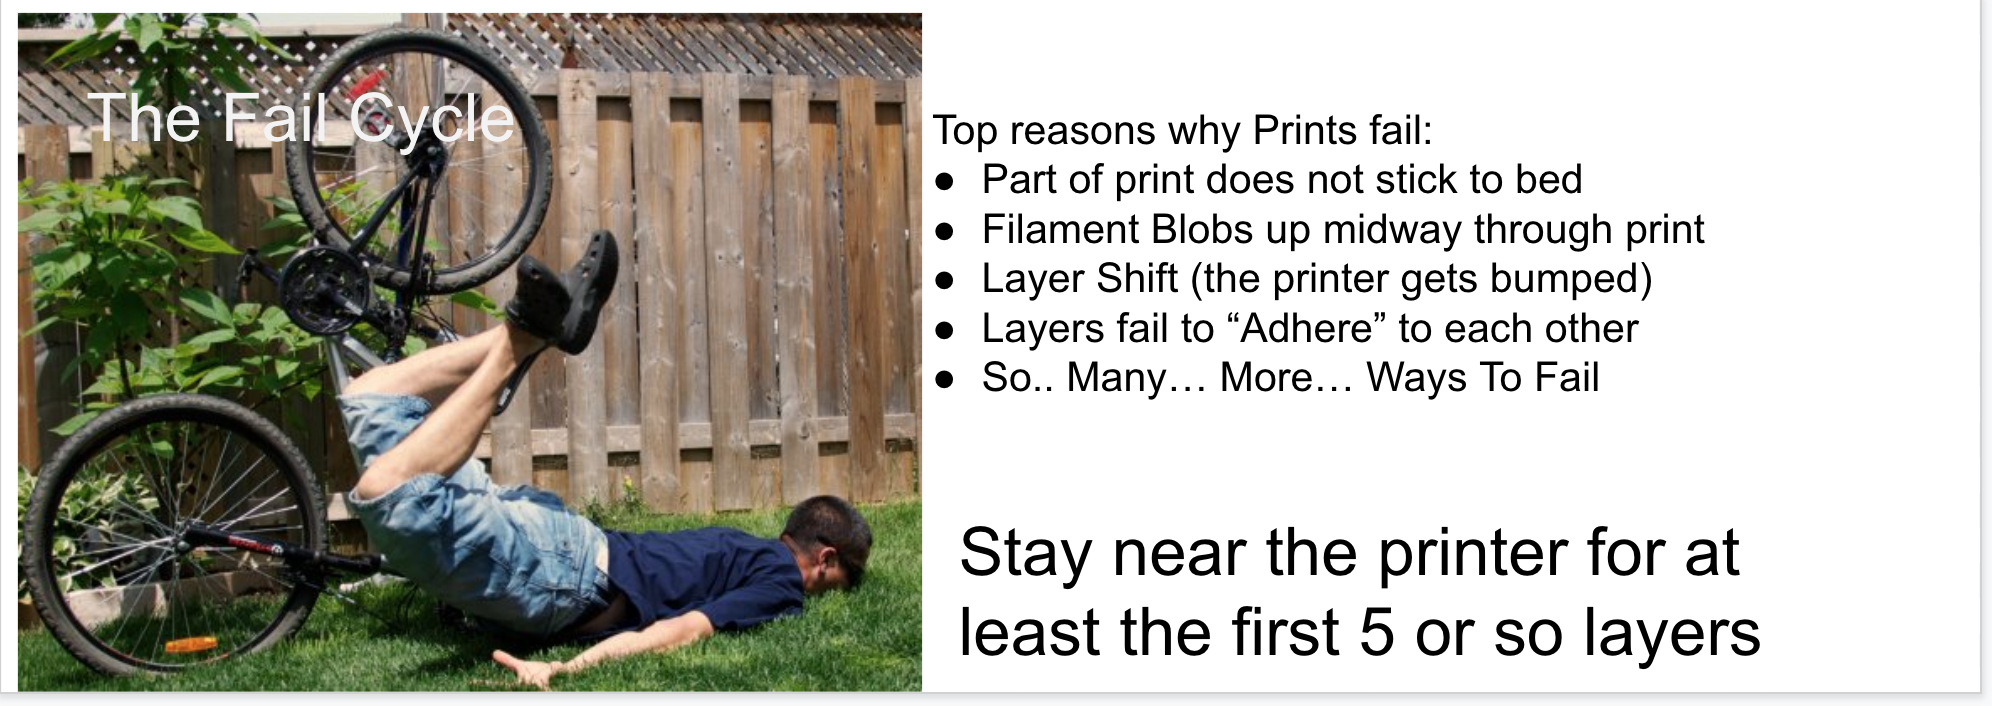
Often prints will take many hours to complete. It's fine if you leave while your print is still going, but please stay long enough to make sure that the first few layers are working.
If you can't find your print after it's done, please check the bins under the Dremel.
¶ My Print Failed! Don't Panic
Your Prints will fail.
You have not failed, you have found just one of the million ways that a print won't work.
3d Printing, as a technology, is still in its infancy. 3d printing in 2020 is kinda where desktop publishing was before WYSIWYG (What You See is What You Get) word processors. The number of variables you have to contend with and account for is innumerable.
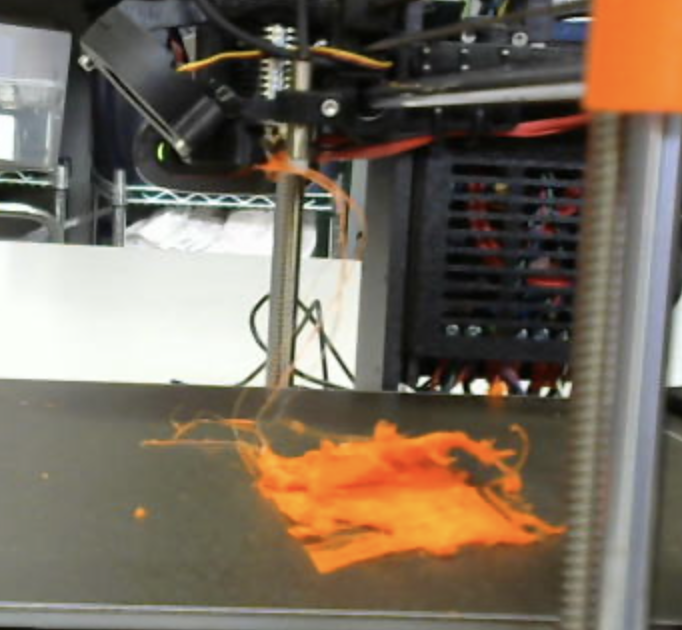
We don't encourage remote printing. You need to make sure the printer is clear, that there's enough filament for your print and that it's the color you want to use. And things can go wrong with the print that are difficult to spot remotely. Here's an example of a print gone awry.